Over the past week or so I have been trying to teach myself the basics of Azure. At first I was completely overwhelmed by the absolute wealth of offering that Azure has. It is a serious contender, an underdog if you will in the world dominated by the likes of AWS etc. Having had an opportunity to play around with AWS a bit in the past I was pleasantly surprised at the ease with which the whole Azure portal and offering just “flows” into your usage patterns. Obviously the wealth of information that Microsoft has made available helped in understanding Azure for what it is.
So I got my Azure account, spun up a few VMs and generally nosed around until I decided to play with Storage and particularly Blob Storage. And that was the moment when my whole smooth Azure experience came crashing down on my head in a cacophony of screeching, jarring, scratching, smashing, breaking noises!
This is how I thought my blob experience would go
Whereas in reality it was more of a
It is one thing to not natively support content manipulation via the Azure management portal for Blobs Microsoft but to not provide any native means whatsoever outside of code? I mean come on, seriously!?
Jim O’Neil you star you
I particularly found Jim O’ Neil’s bite size videos on Azure to be absolutely brilliant. I grew a fan of how he explains the fundamentals of every bit of Azure in about 15 minutes or so and how he manages to capture the essence of each topic that he picks. I would definitely recommend checking them out. Here is the link for the blob video, you can find all the other links at this same address http://channel9.msdn.com/Blogs/DevRadio/Microsoft-DevRadio-Part-2-Practical-Azure-with-Jim-ONeil–What-to-do-with-Blobs
What is a blob again?
For the uninitiated – a blob (which lives in a container which again lives in a storage account) is in its very essence a simple key value pair which eventually has a HTTP end point. Think of it as a way to store “stuff” i.e. files, byte content etc. in the Azure storage cloud which is identified by a unique key. And as you have guessed so far by my rant Microsoft does not provide a native way within the Azure portal to upload files (or in other words create blobs) in your storage containers. You can use freeware such as CloudBerry or write .NET code using the Azure SDK or use PowerShell to do that but there is no native way to do this within Azure portal itself.
I decided to use PowerShell to store some “stuff” in blob and quickly realized that it is an absolute pain in the proverbial to get started with PowerShell and Blob storage. I kept encountering this error
Can not find your azure storage credential. Please set current storage account using
“Set-AzureSubscription” or set the “AZURE_STORAGE_CONNECTION_STRING” environment variable.
So I wanted to pen down a quick “Dummy’s guide to PowerShell and Blobs in Azure” here to save some of my fellow technologists from scratching their eyes out in frustration.
Here is a step by step on how to create a blob in a container in a storage account in Azure using PowerShell
Dummy’s Guide to Blobs, Azure and PowerShell
1. Start by following this link to install and configure Azure PowerShell cmdlets.
2. Once you have imported your Azure subscription (which really is a X509 certificate) log onto your Azure portal and create a Storage Account and a Container. For the sake of this example we will assume a storage account called “FunkyStorage” and a container called “FunkyContainer”. You will find this link helpful. Feel free to ignore all C# related bits in the article.
3. Log onto your Azure portal and get the Access Key from your Storage account. The following screenshot shows you how to do this.
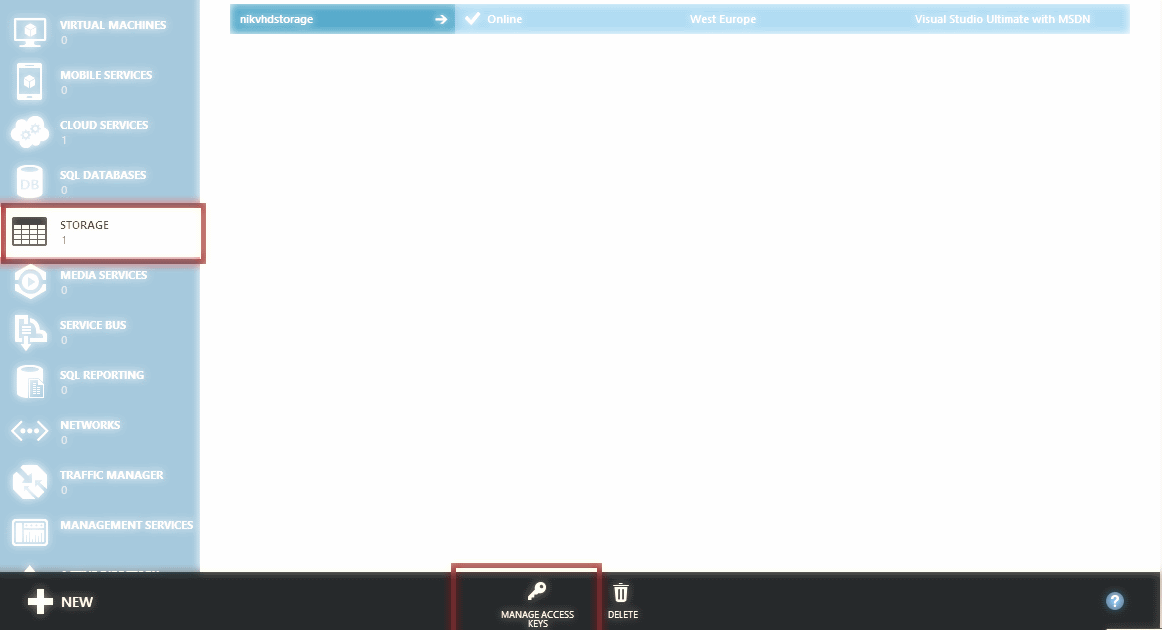
On clicking the link highlighted you shall get two storage keys. Select anyone that you like.
4. Now that we have the environment all setup and have obtained the access key for this storage account it is time to use PowerShell to move a file into your storage account and create a blob. Fire up PowerShell and run this command to ensure your Azure subscription is all setup.
Get-AzureSubscription
You should see the details of your subscription come up within the PowerShell console. If you don’t see the details please verify you have imported the publishsettings file correctly. If you still can’t make it work drop me a line here in the comments section and I will do my best to help.
Assuming you can see your Azure subscription details fire these two commands one after the other which would move a file called 1.txt from your temp director in the C drive into your container within Azure and create a blob called “MyFunkyBlob”.
$context = New-AzureStorageContext -StorageAccountName FunkyStorage -StorageAccountKey {Enter your storage account key here}
Set-AzureStorageBlobContent -Blob “MyFunkyBlob” -Container FunkyContainer-File “c:\temp\1.txt” -Context $context -Force
That’s it! This should now give you a blob called MyFunkyBlob and store the 1.txt file in it. Once you understand the basics I would definitely recommend using something like CloudBerry to easily move files back and forth between your Azure storage and local machine instead of hacking around with PowerShell.
Questions, comments? Let me know! Thanks for reading!
12 Trackbacks